How to Cure Common Shooting Mistakes
21st Aug 2014
As any new shooter soon discovers, shooting a handgun accurately isn’t nearly as easy as they make it look on TV. Attaining proficiency requires a thorough understanding of the fundamentals of marksmanship coupled with a strong desire to improve. One of the best ways to better your skills is to analyze your targets routinely and listen to what they’re telling you.

Assuming your handgun is properly zeroed, sight alignment issues will show up quickly on target—as in these examples. At far left, proper sight alignment: Top of the front sight even with the top of the rear sight, front post centered in the rear notch.
Of the seven fundamentals of marksmanship, sight alignment, sight picture and trigger control are most critical to handgun accuracy. Sight alignment is the relationship between the handgun’s front and rear sight. Sight picture is simply a matter of superimposing the aligned sights onto the intended target. Trigger control refers to the depression of the trigger to the rear until the shot breaks.
To align your handgun’s sights properly, you must confirm that the top of the front sight is level with the top of the rear sight. This ensures proper elevation, meaning that your aim is neither too high nor too low. Of course, you must also align the sights horizontally.
When your sights are aligned properly, there will be equal distance between the front sight and either side of the rear-sight notch. If there is more of a gap on the right side, the pistol is pointing more to the left than you intend, and rounds will go that way, and vice versa.
Sight alignment becomes more critical as the distance between you and the target increases. Handguns field editor Dave Spaulding, founder of Handgun Combatives, and other prominent instructors will tell you that if your sight alignment is off by just 1/16th of an inch at 20 feet, the result will be a 4.5-inch separation between point of impact and your intended target.
How do you know if you’re dealing with sight alignment issues? If, say, your groups at the five-yard line are pretty much on the money, but at 20 yards they’re printing considerably farther left, you may need to work on alignment. However, also have someone else shoot the gun to rule out the possibility of the sights themselves being misaligned. If your zero is off, that too will really start to show up at longer distances.
Trial and Error
Keep in mind this is only one possibility. These results could also be indicative of the gun shifting in your hand as you shoot. Analyzing a target is like diagnosing a problem with a vehicle. A qualified mechanic can narrow the field of potential causes based on the way the vehicle is performing, just as you can eliminate certain shooting errors based where your rounds impact the target, but there is bound to be a degree of trial and error involved in either endeavor.
As with most shooting problems, sight alignment can be improved through dry-fire practice. With an unloaded handgun or a designated training gun, simply punch out the weapon until it intersects your line of sight. Then look for that proper placement of the front sight within the notch of the rear sight.
Rather than merely glimpsing this proper sight alignment, force yourself to stare at it for approximately 30 seconds. This will help imbed the image of proper sight alignment into your mind so that it’s more recognizable for you when you’re on the range or, more importantly, during a personal-defense situation.

Groups scattered? It may be that you lack front-sight focus. The front sight must be the sharpest object in the sight picture for consistent, accurate shot placement.
Achieving a proper sight picture requires nothing more than placing those perfectly aligned sights over your intended target. By combining proper sight alignment and sight picture, you have successfully aimed your handgun. As long as you maintain that proper aim throughout the process of firing your handgun, your point of impact should be very close to your point of aim—and your targets should reflect that.
If your rounds are scattered, the problem could be that you’re focusing more on the target than the front sight. As you can imagine, this is a serious concern when facing an armed assailant in the real world. By default, if you’re focused on the threat, you’re not focused on the front sight of your handgun.
For optimal accuracy, you should be focused intently on the front sight when the trigger is depressed. This means both the target and your rear sight will be slightly blurred. Many shooters are aware of the importance of front-sight focus, but I wonder how many actually focus on the front sight at the exclusion of both the target and the rear sight.
It wasn’t until I had carried a handgun on duty for several years that I truly understood what it meant to obtain that elusive crystal clear image of the front sight. One day at the range, something finally “clicked” and the front sight became more pronounced than ever before. Prior to this revelation, I had merely looked at the front sight when shooting, but I hadn’t focused on it as intently as was necessary to obtain maximum accuracy from my handgun.
In order to hammer home the importance of front sight focus, many instructors encourage their students to look for a tiny imperfection on the front sight and focus on that as opposed to the entire front sight. (You could also use a permanent marker or even nail polish to make a tiny dot on your front sight.) I have used this approach with students to great effect.
Another drill I use is to have a student draw an unloaded firearm and punch out to a two-handed, sighted fire shooting position. From there, the student is instructed to focus intently on the front sight. After approximately 30 seconds, I will have the student bring his or her gun down out of the line of sight. After several repetitions of this drill, most students seem to pick up what took me years to develop: an intense front-sight focus.
A clever drill that I picked up from National Training Concepts owner R.K. Miller is to have the shooter hold a pen and extend his arm out front. The shooter can pick a target in the distance and practice transferring his or her gaze from the tip of the pen to the target and back again. This trains the shooter’s eye to transition between the front sight and the target. It’s important to remind the shooter that when the shot breaks the focus should be on the tip of the front sight or, in this case, the tip of the pen.
Not even perfect sight alignment and sight picture can compensate for a lack of trigger control. In fact, trigger control is often cited as the most common error in shooting a handgun.
The act of manipulating the trigger has many names. Since the index finger contracts during this process, many naturally refer to trigger manipulation as “trigger pull.” However, some instructors prefer the term “trigger press” because it denotes a more precise movement. Still others use “trigger squeeze” to describe trigger manipulation because they feel the word squeeze accurately conveys the gradual pressure that should be applied to the trigger when firing.
No matter what you call it, trigger control is hugely important. Most instructors agree it’s critical that the rearward movement of your index finger be smooth and steady as it moves straight back to fire the pistol. Two of the most common trigger control problems are to anticipate the gun’s recoil—jerking the trigger—and failing to move the trigger finger independently of the rest of the hand.
Anticipating recoil tends to result in a right-handed shooter’s rounds impacting low on the target. This phenomenon is readily apparent when you engage in dry-fire practice using a pistol equipped with a laser. If, as a right-handed shooter, you jerk the trigger, the laser will slice downward and likely to the left, showing you where your live rounds would have impacted.
Failing to move the trigger finger independently is less predictable because the point of impact is dependent on the movement of the shooter’s hand when the trigger is activated. For instance if a right-handed shooter rotates his thumb clockwise during the trigger press, his rounds are likely to impact to the right. This error is often referred to as “thumbing.”
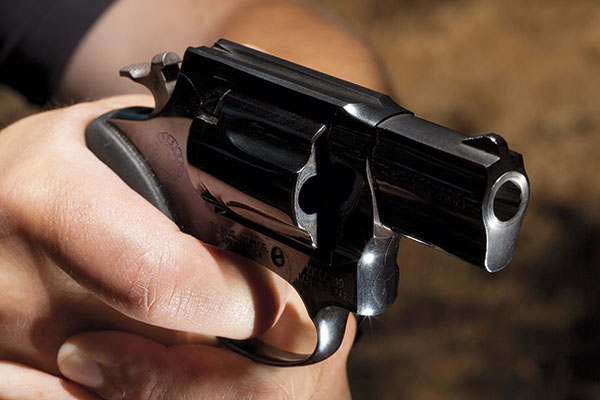
If your gun is the right size for your hand, you should be able to comfortably place the pad of your index finger on the trigger while maintaining a proper shooting grip with the bore in line with your forearm.

If your trigger manipulation isn’t spot-on, all the sight alignment in the world can’t save you. Shown are some common trigger errors and where they might be sending your bullets.
Too much finger on the trigger is likely to result in “snatching” the trigger, which will send a right-handed shooter’s rounds to the right of his or her point of aim. This occurs because the distal joint bending reflexively causes the hand and muzzle to rotate clockwise.
Too little finger on the trigger is known as “pushing” the trigger because it causes the trigger finger to push the trigger back and to the left as opposed to straight back, resulting in rounds impacting near the nine o’clock position.
Another error associated with trigger control is “heeling,” in which the shooter exerts excessive forward pressure with the heel of the hand as the weapon is fired. This will likely result in a shot group near the 12 o’clock position.
Of course, this pattern could also be the result of an improper sight alignment, where the front sight protrudes above the rear sight. Again, target diagnosis, while extremely beneficial in narrowing down the field of potential shooting errors, is not an exact science.
Trigger Reset
While the focus of this article has been on one-shot accuracy, it’s important to consider that trigger control also deals with “resetting” the trigger from shot to shot. Resetting the trigger refers to the technique of releasing the trigger only as far as necessary for the handgun to be fired again. With most pistols there is both an audible “click” and a very slight forward thrust of the trigger against your finger as it resets.
The obvious advantage to controlling trigger reset is that it affords the shooter a shorter length of pull, which minimizes the time you need to maintain proper aim, and it reduces the distance your index finger travels when activating the trigger.
How can you tell if your trigger reset skills are lacking? Aside from being able to feel that you’re not controlling the trigger, your groups will tend to widen. But there’s no way to predict where your rounds will impact because it depends on the manner in which the gun moves as you press the trigger.
As you might expect, there are myriad drills designed to improve trigger control. One of the easiest and most effective ways to improve trigger control is simply to dry fire. To really enhance your trigger control through dry fire, press the trigger rearward as far as possible without allowing the hammer to fall, then release. Moving the trigger finger back and forth in this manner, taking it to the very brink of the simulated shot breaking can really enhance your feel for the trigger of your particular handgun.

There are several ways to enhance trigger control. One good exercise is the penny drill. You should be able to dry fire a handgun with a penny on the front sight and not have the penny fall off.
Just as a pen can be used to replicate a front sight when honing your proper sight picture, a retractable pen can be used to practice trigger press and trigger reset. Simply hold the pen in your hand so the retractable button is facing away from you, as though it were the trigger of your handgun. Place the pad of your index finger on the button then slowly and smoothly press the button until it clicks, without moving any other portion of your hand.
This motion simulates pressing the trigger to the rear until the shot breaks. Retract the tip slightly then allow it to move forward until it clicks to replicate trigger reset.
Another simple and effective drill to facilitate trigger control is called the “penny drill.” Place a penny on the front sight of your unloaded handgun, then obtain proper sight alignment and sight picture. Apply steady rearward pressure to the trigger until the simulated shot breaks. If the penny is still atop your front sight, you’re as good as gold—or at least copper.